Friday, January 31, 2014
BlackBerry 9630 Bold hard reset

A full reset is sometimes referred to as a hard reset. Perform a full reset when you want to clear all settings, programs and data from RAM.
Caution if you perform a full reset, your BlackBerry Bold 9700 Bold2 or 9780 returns to its default settings and looses all information that is not recorded in ROM.
Before you delete your BlackBerry® device data or media card files, consider backing up these items so that you have a copy on your computer. CAUTION: If you have turned on encryption, the process for deleting all device data can take up to an hour to complete. You cannot stop the process after you start it. If you reset your device, the process restarts after the device restarts.
To perform a hard reset:
On the Home screen or in a folder, click the Options icon.
Click Security *gt; Security Wipe.
To delete data from the messages application, contacts application, and other applications, select the Emails, Contacts, Etc check box.
To delete all third-party applications that you have added, select the User Installed Applications check box.
To delete all files from your media card, select the Media Card check box.
Type blackberry.
Click Wipe.
Thursday, January 30, 2014
Nokia Asha 300 Ringer Problem Solution jumpers
Nokia Asha 300 ringer problem can be solve with a few steps that are given in diagram bellow so look at diagram bellow to solve love ringer voice, no ringer tones, no ringer working problems in nokia asha 300.in diagram there are two colors blue and red both colors are defining path of circuit in mobile phone.Nokia 2320 Classic Mic Problem Solution Jumper Ways see All cellular mobile repair solution

Check ringer and if ringer do not show continuity or a good value with meter then change ringer with new one. Check points on board where ringer have to attaché after put in casing housing.
Then check all these paths as shown in diagram above and if any of them is broken or missing components then apply jumpers as described above. Small circle shows positions where we are able to make jumpers. in these place we can apply jumpers to solve ringer problem in nokia asha 300.
for more detail and new tips and tricks about cellphone service problem keep visiting this page we will update cellphone service diagrams timely with new cellphone diagrams.some related post are also given bellow you can read them also for more information about cellphone.
Micromax Funbook Infinity P275 Firmware
Micromax Funbook Infinity P275

Quote:
| Packaged Included: Firmware V2_25.09.2012 Download Tool PhoenixPacket_V302_20120718 Driver |
Flashing Hints: Continuesly press side HOME key, insert cable then toggle ON/OFF key, SW will start.
How to hard reset Samsung Galaxy Y Duos
Samsung Galaxy Y Duos Secret Codes
Galaxy Y Dual Sim Code
Here i am going to show you how to access the internal function of galaxy y or android phone for testing the various hardware parts of your phone if it is working properly or not with the help of this secret code you can test lcd, vibration, camera, sensor (accelerometer sensor, proximity sensor, magnetic sensor), touch screen, speaker, sub key, etc... if you have any hardware problem with your galaxy y duos you can identify with this code if it is working or not to do this follow the steps below.
First of all open your keypad
Then dial the secret code *#0*#. Now you get a screen with title LCD TEST and below that you have lots of option to test various hardware parts of your phone such as speaker, sensor, lcd, etc
To go back use right physical button
while testing the touch you have to touch and mark all the squares back button does not work
Other use full secret codes for android phone tested on galaxy y
These codes will work on all the models of galaxy series.

Galaxy Y Dual Sim Code
Here i am going to show you how to access the internal function of galaxy y or android phone for testing the various hardware parts of your phone if it is working properly or not with the help of this secret code you can test lcd, vibration, camera, sensor (accelerometer sensor, proximity sensor, magnetic sensor), touch screen, speaker, sub key, etc... if you have any hardware problem with your galaxy y duos you can identify with this code if it is working or not to do this follow the steps below.
First of all open your keypad
Then dial the secret code *#0*#. Now you get a screen with title LCD TEST and below that you have lots of option to test various hardware parts of your phone such as speaker, sensor, lcd, etc
To go back use right physical button
while testing the touch you have to touch and mark all the squares back button does not work
Other use full secret codes for android phone tested on galaxy y
- * #1234# to check software version of phone.
- *#12580*369# to check software and hardware information.
- *#0228# Battery status (ADC, RSSI reading)
- *#32489# Service mode
- *#7780# factory data reset galaxy y
- *2767*3855# Full factory reset (Dont dial it does not ask you to confirm unless you have problem)
These codes will work on all the models of galaxy series.
Wednesday, January 29, 2014


Samsung I8320 Vodafone 360 H1 flash file
I8320 Vodafone 360 H1
CSC Files: I8320VGRIK5 - I8320VD2IJ4 - I8320ATLIK5
Tuesday, January 28, 2014


Samsung Galaxy Gear gets first custom ROM includes native app installation and full


FEATURES
- MK7 BASE
- ROOTED
- SUPERUSER
- COMPLETELY DEODEXED
- NOVALAUNCHER INCLUDED
- HOMEBUTTON FIX / POWER BUTTON LOCKS SCREEN WHEN USING CUSTOM LAUNCHERS.
- NO WIPE BASE
- WEATHER WIDGET / REMOVED STATIC "WEATHER" TEXT
- DISABLED SAMSUNG SIGNATURE VERIFICATION
- NATIVE APK INSTALLATION
- INCREASED VIDEO RECORDING LIMIT TO 60 SECONDS
- VPN ENABLED
- CM10.2 BROWSER
- WALLPAPER SUPPORT
- LIVE WALLPAPER SUPPORT
- CM10.2 GALLERY
- THIRD PARTY CONTACT WIDGET & APP CRASH FIX
- SETTINGS / FULL SETTINGS DIALOG
- MTP SUPPORT / ENABLED IN STORAGE SETTINGS
- BLUETOOTH TETHERING
- MULTIPLE BLUETOOTH DEVICE PAIRING
- NATIVE EMAIL CLIENT
- NAVIGATION BAR
FAQ / IT DOESNT WORK ! WAH
- INTERNET ACCESS
GO INTO "FULL SETTINGS -> BLUETOOTH -> SELECT YOUR PHONE SETTING ICON (ON THE RIGHT OF PHONE NAME) -> TICK INTERNET ACCESS".
ENSURE BLUETOOTH TETHERING IS ENABLED ON YOUR PHONE BEFORE HAND OBVIOUSLY.
*NOTE* ENSURE YOUR MOBILE DEVICE SUPPORTS TETHERING, US VARIANT PHONES HAVE RESTRICTIONS INPLACE.
*NOTE 2* BLUETOOTH TETHERING DOES NOT AUTO RECONNECT, INSTALL THIS THIRDPARTY SOLUTION ON YOUR GEAR TO ENABLE AUTO RECONNECT.
- HOW DO I FULL WIPE?
BOOT INTO RECOVERY MODE AND SELECT THE "RECOVERY" OPTION. DO THIS AFTER FLASHING THE ROM
- SCREEN FLICKERING/GITTERING
THIS IS CAUSED BY THE INITIAL BOOTUP, REBUILDING THE CACHE AND INITIALIZING ALL THE APPS. GIVE YOUR GEAR A FEW MINUTES TO SETUP AND RESTART.
- SCREEN UNLOCKS TO NOVALAUNCHER PAGE PREVIEW?
GO INTO "NOVA SETTINGS -> GESTURES -> HOME BUTTON -> NONE".
- USB DEBUG
GO INTO "SETTINGS -> GEAR INFO -> ABOUT GEAR", TAP SOFTWARE VERSION 10 TIMES.
- ENABLE UNKNOWN SOURCE APK INSTALLATION
GO INTO "FULL SETTINGS -> SECURITY -> TICK UNKNOWN SOURCES".
- ENABLE MTP
GO INTO "FULL SETTINGS -> STORAGE -> MENU BUTTON (TOP RIGHT OF SCREEN) -> USB COMPUTER CONNECTION -> MEDIA DEVICE (MTP)".
- WATCH STYLER NOT WORKING
ENSURE ITS SELECTED AS THE DEFAULT WATCHFACE IN GEAR MANAGER.
IF CLOCK FACE DOES NOT UPDATE UPON CHANGING, RESTART GEAR.
- DOUBLE CLICK HOME BUTTON DOESNT WORK ON TOUCHWIZ LAUNCHER !
*NOTE* DO NOT DO THE FOLLOWING IF YOU ARE USING NOVALAUNCHER, YOU WILL NOT BE ABLE TO MANUALLY LOCK YOUR GEAR.
NAVIGATE/PULL THE FOLLOWING FILE FROM YOUR GEAR: /SYSTEM/USR/KEYLAYOUT/GPIO-KEYS.XML
EDIT IN A TEXT EDITOR SO IT LOOKS LIKE THE BELOW:
Code:key 115 VOLUME_UP WAKE
key 114 VOLUME_DOWN WAKE
key 116 POWER WAKE
key 172 HOME WAKE
DOWNLOAD
MD5: 2ccc64976c0a043109159e9a11a6292f
INSTRUCTIONS
- HOLD POWER BUTTON ON GEAR UNTIL THE RESTART SCREEN APPEARS.
- ON THE RESTART SCREEN, PRESS POWER BUTTON 5 TIMES TO ENTER RECOVERY MODE.
- PRESS POWER BUTTON ONCE TO NAVIGATE THE RECOVERY SCREEN TO DOWNLOAD MODE.
- HOLD POWER BUTTON FOR 3 SECONDS TO SELECT THE OPTION AND ENTER DOWNLOAD MODE.
- CONNECT GEAR TO PC & OPEN UP ODIN V3.09.
- SELECT "AP" OPTION & SELECT THE ROM, LEAVE OTHER OPTIONS AS DEFAULT.
- VERIFY YOU CAN SEE YOUR GEAR IN THE ID:COM SECTION OF ODIN & PRESS START TO BEGIN FLASH.
Monday, January 27, 2014
Symphony EX72 Flash File
Symphony EX72 (MTK-6223)

INFO-
TBG111217_6492_PCB01_GPRS_MT6223P_S00.111217_64 92_V0716.BIN

INFO-
TBG111217_6492_PCB01_GPRS_MT6223P_S00.111217_64 92_V0716.BIN
Nokia Lumia 1020 Restore Factory Hard Reset Remove Pattern Lock
Nokia Lumia 1020 Restore Factory Hard Reset Remove Pattern Lock
Before you buy a new cell phone or a new tablet, try the following procedure to repair your appliance. Charge first battery, make backups of your important data, if possible, and in most cases, remove SIM and SD card. Unable to recover data after performing a hard reset, Internet backup is always important. For all data, a backup should be performed on an external device, hard disk or system support band. With or without insurance, if your lost cell phone, damaged or stolen, at least, is a backup copy of your valuable data in a safe place.
Nokia Lumia 1020 force reboot and factory reset
Press and hold both the Volume down and the Power keys for 15 seconds. Warning! All downloaded apps, messages, all data will be deleted and restored to factory state!
Nokia Lumia 1020 hard reset
First try this to soft reset your Nokia 1020 Lumia. Turn off your Nokia 1020 Press and hold the Volume down and Power buttons until it vibrates, after that you have to release all the keys then phone will vibrate 3 times. All data will be lost!
To hard reset your Nokia Lumia 1020 using key combination – WP8 – Windows Phone 8
Recover your Windows phone 8 phone Nokia Lumia 1020 (WP 7 see below) reset forgotten password Nokia Lumia 1020 phone, unlock your Nokia Lumia 1020
1. Turn your Lumia 1020 off.
2. Press Volume DOWN and keep pressing it while you connect the charger until you see an exclamation mark!.ZTE Z431 User Guide Manual Free download now
3. Press – in this order – Volume UP – Volume DOWN – POWER – VOLUME DOWN.
4. Your phone will reset and reboot. Pls be patient during the reset process.
To hard reset your Nokia Lumia 1020 using key combination – WP7 – Windows Phone 7
Turn off your Nokia Lumia 1020. Press and hold the following buttons Camera + Volume down + Power until your phone vibrates, then release only the Power key and keep pressing the Camera + Volume down for a couple of seconds 4-5s until the phone reboots.
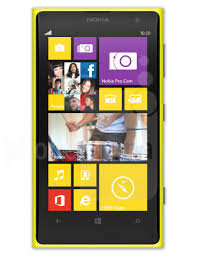
Nokia Lumia 1020 Restore Factory Hard Reset Format Phone.So lets start the Nokia Lumia 1020 Restore Factory, Nokia Lumia 1020 Hard Reset.Turn Off the mobile phone for few mints.Nokia Lumia 1020 Remove Pattern Lock.
Before you buy a new cell phone or a new tablet, try the following procedure to repair your appliance. Charge first battery, make backups of your important data, if possible, and in most cases, remove SIM and SD card. Unable to recover data after performing a hard reset, Internet backup is always important. For all data, a backup should be performed on an external device, hard disk or system support band. With or without insurance, if your lost cell phone, damaged or stolen, at least, is a backup copy of your valuable data in a safe place.
Nokia Lumia 1020 force reboot and factory reset
Press and hold both the Volume down and the Power keys for 15 seconds. Warning! All downloaded apps, messages, all data will be deleted and restored to factory state!
Nokia Lumia 1020 hard reset
First try this to soft reset your Nokia 1020 Lumia. Turn off your Nokia 1020 Press and hold the Volume down and Power buttons until it vibrates, after that you have to release all the keys then phone will vibrate 3 times. All data will be lost!
To hard reset your Nokia Lumia 1020 using key combination – WP8 – Windows Phone 8
Recover your Windows phone 8 phone Nokia Lumia 1020 (WP 7 see below) reset forgotten password Nokia Lumia 1020 phone, unlock your Nokia Lumia 1020
1. Turn your Lumia 1020 off.
2. Press Volume DOWN and keep pressing it while you connect the charger until you see an exclamation mark!.ZTE Z431 User Guide Manual Free download now
3. Press – in this order – Volume UP – Volume DOWN – POWER – VOLUME DOWN.
4. Your phone will reset and reboot. Pls be patient during the reset process.
To hard reset your Nokia Lumia 1020 using key combination – WP7 – Windows Phone 7
Turn off your Nokia Lumia 1020. Press and hold the following buttons Camera + Volume down + Power until your phone vibrates, then release only the Power key and keep pressing the Camera + Volume down for a couple of seconds 4-5s until the phone reboots.
Nokia Lumia 1020 Restore Factory Hard Reset Format Phone.So lets start the Nokia Lumia 1020 Restore Factory, Nokia Lumia 1020 Hard Reset.Turn Off the mobile phone for few mints.Nokia Lumia 1020 Remove Pattern Lock.

Sunday, January 26, 2014
Samsung Galaxy S III Android 4 2 1 Jelly Bean LEAKED BETA firmware
Android 4.2.1
is still under testing phase by Samsung and they will release the official final Android 4.2.1 Jelly Bean update for the Galaxy S III after the launch of the Samsung Galaxy S IV.
New enhancements in I9300XXUFMB3 FW:
- Android 4.2.1 – JOP40D
- Improved Ripple effect on Lockscreen
- New Android 4.2.1 Lockscreen with widgets
- Daydream (Settings>Display)
- New Additions in Notification Center
- Notifications are more actionable
- Voice Command (Let’s you control various parts of the phone using voice commands)
- Found more? Tell us about them in the comments below!
WARNINGS:
We have repackaged this firmware into an ODIN Flashable firmware ourselves from the dump files we took from Saturn’s device. This firmware will increase your binary counter, if you don’t know what this means then don’t flash this firmware. This Firmware will also change your device status to Modified. This firmware doesn’t contain any Modem so the Modem you are using before flashing this firmware will remain. This is a PRE-RELEASE version so not official from KIES. As this is a PRE-RELEASE firmware some minor bugs are to expect.
We have FULLY TESTED this firmware and this firmware works perfectly as any other official firmware.
Firmware Details
Android Version: 4.2.1 – JOP40D (Jelly Bean)
PDA: I9300XXUFMB3
CSC: I9300OJKFMB3
MODEM: N/A
Region: Middle East
Carrier: Unbranded
Changelist: 171637
Build Date: 19th February 2013
Download: I9300XXUFMB3_I9300OJKFMB3_ILO.zip
Screenshots:


Big Thanks To ,
Thanks to forum member Saturn from XDA and clubandroid
is still under testing phase by Samsung and they will release the official final Android 4.2.1 Jelly Bean update for the Galaxy S III after the launch of the Samsung Galaxy S IV.
New enhancements in I9300XXUFMB3 FW:
- Android 4.2.1 – JOP40D
- Improved Ripple effect on Lockscreen
- New Android 4.2.1 Lockscreen with widgets
- Daydream (Settings>Display)
- New Additions in Notification Center
- Notifications are more actionable
- Voice Command (Let’s you control various parts of the phone using voice commands)
- Found more? Tell us about them in the comments below!
WARNINGS:
We have repackaged this firmware into an ODIN Flashable firmware ourselves from the dump files we took from Saturn’s device. This firmware will increase your binary counter, if you don’t know what this means then don’t flash this firmware. This Firmware will also change your device status to Modified. This firmware doesn’t contain any Modem so the Modem you are using before flashing this firmware will remain. This is a PRE-RELEASE version so not official from KIES. As this is a PRE-RELEASE firmware some minor bugs are to expect.
We have FULLY TESTED this firmware and this firmware works perfectly as any other official firmware.
Firmware Details
Android Version: 4.2.1 – JOP40D (Jelly Bean)
PDA: I9300XXUFMB3
CSC: I9300OJKFMB3
MODEM: N/A
Region: Middle East
Carrier: Unbranded
Changelist: 171637
Build Date: 19th February 2013
Download: I9300XXUFMB3_I9300OJKFMB3_ILO.zip
Screenshots:
Big Thanks To ,
Thanks to forum member Saturn from XDA and clubandroid

Saturday, January 25, 2014
Nokia 111 Mic Problem Jumpers Ways Solution
Nokia 111 have mic problem our voice can not reach to destination and we can not record voice in it.mic problem can be reason of parts damages or carbon rust and water damages.so to solve this issue in Nokia 111 look at diagram bellow and check all these components and parts.these parts are used in Microphone function in Nokia 111.Nokia 5250 Bluetooth Problem Solution Ways Jumpers

once you have dis assembled mobile phone look at board vary carefully and check if there is some rust or carbon.Clean
these parts and area with electronics cleaner and leave it to dry for a few mints with hot air.In above diagram all tracks are given in red and blue colors.these tracks show positive and negative paths of mic parts.so check these components and paths with electronics miter and if path missing apply jumpers.
Because mic is attached with board so you can remove it with solding iron by applying much solder on mic and then slip it once it is too hot.And use new mic to fix mic problem in Nokia 111.
for more detail and new tips and tricks about cellphone service problem keep visiting this page we will update cellphone service diagrams timely with new cellphone diagrams.some related post are also given bellow you can read them also for more information about cellphone.
How to increase internal memory of samsung galaxy ace
Samsung Galaxy Ace is featured with 832 MHz Processor, a RAM of 512 MB, and a 32 GB upgradable storage. Like the previous Samsung’s Smartphones, it has also created a large user base or fan base. With an affordable price range, they also have provided some really good features with an elegant design and stunning look
Android Smartphone are an excellent way to take all your private and important files, images, data, and all other imperative data with you. Thus we can declare that it is one of the finest gadgets in our pocket which has plenty of information regarding you.
So in this tutorial we will be showing you how to increase the internal memory of your Samsung Galaxy Ace. Just follow the simple steps given below
Disclaimer
This tutorial will definitely work when using Samsung Galaxy Ace only. While working of it on others is not yet confirmed. On applying this installation to another model or device may give an unwanted result. While applying this update we will not be responsible if anything occurs to your device, so continue at your own risk.
Pre-Requisite
- For successful completion of this rooting process charge your phone up to a minimum of 75% battery.
- You must take a back-up of all your personnel items and other impotent data, such as Call Logs, SMS, Contacts, Audios, Images, Videos, APN (Access Point Names) settings, Bookmarks, MMS settings, on your phone.
- One must install a custom recovery image particularly for his Android device. To do this, ClockworkMod Recovery should be downloaded using the Internet.
- If you have not, then you must unlock your Android device’s Bootloader.
- You must enable USB Debugging mode on your Samsung Galaxy Ace. Just follow, Settings–>Applications–>Development–>USB debugging. There select the USB Debugging icon.
Steps for Increasing Internal Memory of Samsung Galaxy Ace

Step 1
Firstly, download MiniTool Partition Wizard app to your computer and then install it. You may download it by just clicking it here.
Step 2
From your Android device disconnect & remove the memory card and insert it in your Computer using a card reader. You must not use USB cable, since this app may not work properly through USBs.
Step 3
Now run the above downloaded app on your computer.
Step 4
Now click on SD card and there do the right click on the “Option” icon. Then select the “Delete” option for a complete deletion of data on your SD card.
Step 5
Now again do the right click on the “Option” icon. Then select the “Create New” option.
Step 6
Now, choose the file type as FAT32 and there allocate the space with such an amount that you believe you’ll be utilizing.
Step 7
Next, again apply the same procedure as above and choose “Create as: Primary”, so to create a new partition (external). This space will be utilized for storing downloaded apps.
Step 8
Finally, select the “Apply” option to finish the process. After this you may insert your SD card into your Samsung Galaxy Ace.
Finished!

Friday, January 24, 2014
LG V Series flash file
LGV Series
V900 LGV900AT-00-V10e-EUR-XXX-JUL-13-2011
V901 LGV901AT-00-V10d-TWN-XXX-JUL-20-2011
V905R LGV905RAT-01-V10c-302-720-APR-15-2011
V909 LGV909AT-00-V11a-OPN-US-MAR-08-2012
V909DW LGV909AT-01-V10p-310-260-JAN-10-2012
>>> DOWNLOAD <<<
V900 LGV900AT-00-V10e-EUR-XXX-JUL-13-2011
V901 LGV901AT-00-V10d-TWN-XXX-JUL-20-2011
V905R LGV905RAT-01-V10c-302-720-APR-15-2011
V909 LGV909AT-00-V11a-OPN-US-MAR-08-2012
V909DW LGV909AT-01-V10p-310-260-JAN-10-2012
>>> DOWNLOAD <<<

Nokia E75 mic solution
Nokia E75 mmc solution tested me try
this i hope solved your problem not solve
contact me

Thursday, January 23, 2014
iPhone Backup Extractor Pro v4 0 7 Cracked
Recover lost iPhone calendar events, contacts, photos, videos, SMS messages, notes, location data and app data from iTunes backup files.

What can the iPhone Backup Extractor recover?
Our iPhone Backup Extractor software can recover contacts, pictures, call histories, MMS, SMS and text messages, video, voice-mail, calendar entries, notes, app files, saved games, debug information and data that might otherwise be inaccessible.
The iPhone Backup Extractor automatically converts the extracted backup databases into CSV, VCard or ICAL formats, so they can be easily imported into Excel, Outlook, or Web-mail. It can convert consolidated location data into a KML file for use with Google Earth
[DOWNLOAD LINK]
[DOWNLOAD LINK]

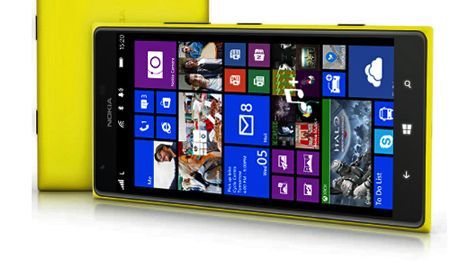
Nokia Lumia 1520 Restore Factory Hard Reset Remove Pattern Lock
Nokia Lumia 1520 Restore Factory Hard Reset Remove Pattern Lock
Before you buy a new cell phone or a new tablet, try the following procedure to repair your appliance. Charge first battery, make backups of your important data, if possible, and in most cases, remove SIM and SD card. Unable to recover data after performing a hard reset, Internet backup is always important. For all data, a backup should be performed on an external device, hard disk or system support band. With or without insurance, if your lost cell phone, damaged or stolen, at least, is a backup copy of your valuable data in a safe place.
Nokia Lumia 1520 force reboot and factory reset
Press and hold both the Volume down and the Power keys for 15 seconds. Warning! All downloaded apps, messages, all data will be deleted and restored to factory state!
Nokia Lumia 1520 hard reset
First try this to soft reset your Nokia 1520 Lumia. Turn off your Nokia 1520 Press and hold the Volume down and Power buttons until it vibrates, after that you have to release all the keys then phone will vibrate 3 times. All data will be lost!
To hard reset your Nokia Lumia 1520 using key combination – WP8 – Windows Phone 8
Recover your Windows phone 8 phone Nokia Lumia 1520 (WP 7 see below) reset forgotten password Nokia Lumia 1520 phone, unlock your Nokia Lumia 1520
1. Turn your Lumia 1520 off.
2. Press Volume DOWN and keep pressing it while you connect the charger until you see an exclamation mark!.LG Rumor Reflex S User Guide Manual Free download now
3. Press – in this order – Volume UP – Volume DOWN – POWER – VOLUME DOWN.
4. Your phone will reset and reboot. Pls be patient during the reset process.
To hard reset your Nokia Lumia 1520 using key combination – WP7 – Windows Phone 7
Turn off your Nokia Lumia 1520. Press and hold the following buttons Camera + Volume down + Power until your phone vibrates, then release only the Power key and keep pressing the Camera + Volume down for a couple of seconds 4-5s until the phone reboots.

Nokia Lumia 1520 Restore Factory Hard Reset Format Phone.So lets start the Nokia Lumia 1520 Restore Factory, Nokia Lumia 1520 Hard Reset.Turn Off the mobile phone for few mints.Nokia Lumia 1520 Remove Pattern Lock.
Before you buy a new cell phone or a new tablet, try the following procedure to repair your appliance. Charge first battery, make backups of your important data, if possible, and in most cases, remove SIM and SD card. Unable to recover data after performing a hard reset, Internet backup is always important. For all data, a backup should be performed on an external device, hard disk or system support band. With or without insurance, if your lost cell phone, damaged or stolen, at least, is a backup copy of your valuable data in a safe place.
Nokia Lumia 1520 force reboot and factory reset
Press and hold both the Volume down and the Power keys for 15 seconds. Warning! All downloaded apps, messages, all data will be deleted and restored to factory state!
Nokia Lumia 1520 hard reset
First try this to soft reset your Nokia 1520 Lumia. Turn off your Nokia 1520 Press and hold the Volume down and Power buttons until it vibrates, after that you have to release all the keys then phone will vibrate 3 times. All data will be lost!
To hard reset your Nokia Lumia 1520 using key combination – WP8 – Windows Phone 8
Recover your Windows phone 8 phone Nokia Lumia 1520 (WP 7 see below) reset forgotten password Nokia Lumia 1520 phone, unlock your Nokia Lumia 1520
1. Turn your Lumia 1520 off.
2. Press Volume DOWN and keep pressing it while you connect the charger until you see an exclamation mark!.LG Rumor Reflex S User Guide Manual Free download now
3. Press – in this order – Volume UP – Volume DOWN – POWER – VOLUME DOWN.
4. Your phone will reset and reboot. Pls be patient during the reset process.
To hard reset your Nokia Lumia 1520 using key combination – WP7 – Windows Phone 7
Turn off your Nokia Lumia 1520. Press and hold the following buttons Camera + Volume down + Power until your phone vibrates, then release only the Power key and keep pressing the Camera + Volume down for a couple of seconds 4-5s until the phone reboots.
Nokia Lumia 1520 Restore Factory Hard Reset Format Phone.So lets start the Nokia Lumia 1520 Restore Factory, Nokia Lumia 1520 Hard Reset.Turn Off the mobile phone for few mints.Nokia Lumia 1520 Remove Pattern Lock.
Wednesday, January 22, 2014

Tuesday, January 21, 2014
ZTE Supreme User Guide Manual Free
Download ZTE Supreme User Guide Manual Free
ZTE Manual Supreme Manual Virgin Mobile – Virgin Mobile for Supreme ZTE was published in September 2013 , with large 5-inch screen and 4G LTE network speed . ZTE Supreme telephony operator for prepaid plans with unlimited text and data plans function . The Supreme Court of Virgin Mobile with dual-core processor 1.5 GHz and major transport 13 megapixel camer a final visual experience .HTC Butterfly S User Guide Manual Free download now

Virgin Mobile ZTE Supreme equipped with the specifications and key features such as : 142 x 100 x 71 (5.6 x 2.8 x 0.4 inches ) in size, with 153 g ( 5.4 0z ) weight , 5 inches IPS LCD capacitive touchscreen 720 x 1280 pixel display of 16 million colors with multitouch and scratch resistant tempered glass microSD up to 64 GB, 8 GB internal storage , 1 GB RAM , 13 megapixel rear camera with LED face flash and Landscape mode compared to 1 megapixel front camera , runs Android 4.1 Jelly Bean OS , powered by a 1.5 GHz dual core , Li – Ion 2500 mAh with up to 360 hours standby and up to 15 hours of time conversation .
User Manual for ZTE Virgin Mobile available for download in pdf format 28.9 MB in size and contains 186 pages Supreme Leader. ZTE Supreme Pdf Manual is also available in Spanish , with size of 4.67 MB
ZTE Manual Supreme Manual Virgin Mobile – Virgin Mobile for Supreme ZTE was published in September 2013 , with large 5-inch screen and 4G LTE network speed . ZTE Supreme telephony operator for prepaid plans with unlimited text and data plans function . The Supreme Court of Virgin Mobile with dual-core processor 1.5 GHz and major transport 13 megapixel camer a final visual experience .HTC Butterfly S User Guide Manual Free download now
Virgin Mobile ZTE Supreme equipped with the specifications and key features such as : 142 x 100 x 71 (5.6 x 2.8 x 0.4 inches ) in size, with 153 g ( 5.4 0z ) weight , 5 inches IPS LCD capacitive touchscreen 720 x 1280 pixel display of 16 million colors with multitouch and scratch resistant tempered glass microSD up to 64 GB, 8 GB internal storage , 1 GB RAM , 13 megapixel rear camera with LED face flash and Landscape mode compared to 1 megapixel front camera , runs Android 4.1 Jelly Bean OS , powered by a 1.5 GHz dual core , Li – Ion 2500 mAh with up to 360 hours standby and up to 15 hours of time conversation .
User Manual for ZTE Virgin Mobile available for download in pdf format 28.9 MB in size and contains 186 pages Supreme Leader. ZTE Supreme Pdf Manual is also available in Spanish , with size of 4.67 MB

ZTE Supreme user manual,ZTE Supreme user guide manual,ZTE Supreme user manual pdf,ZTE Supreme user manual guide,ZTE Supreme owners manuals online,ZTE Supreme user guides,


Monday, January 20, 2014
How to Jailbreak Your iPhone 4S
How to Jailbreak Your iPhone 4S Using Absinthe (Windows) [5.0, 5.0.1]
These are instructions on how to perform an untethered jailbreak of your iPhone 4S using Absinthe for Windows.
Warning***: Before you continue make sure to do a backup of your device in iTunes as you may lose your Camera Roll during this process.
Step 1
Download the latest version of Absinthe from here.
Step 2
Double click to extract the downloaded archive and launch the Absinthe application.

Step 3
As prompted, connect your iPhone 4S to the computer via USB. Make sure to remove any passcodes or VPN settings youve previously set.

Step 4
Click the Jailbreak button to begin

Step 5
The application will take you through several steps of the jailbreak: Sending initial data, waiting for reboot, waiting for device to finish booting, Preparing jailbreak data, and Sending payload data.


Step 6
You will be informed that the jailbreak is Almost done.

Step 7
On your device, locate the Absinthe icon and press it to complete your jailbreak. It could be on any homescreen.

If the server is down and you get an Error establishing a database connection message then tap the Settings icon on your springboard and turn on VPN.

Warning***: Before you continue make sure to do a backup of your device in iTunes as you may lose your Camera Roll during this process.
Step 1
Download the latest version of Absinthe from here.
Step 2
Double click to extract the downloaded archive and launch the Absinthe application.
Step 3
As prompted, connect your iPhone 4S to the computer via USB. Make sure to remove any passcodes or VPN settings youve previously set.

Step 4
Click the Jailbreak button to begin

Step 5
The application will take you through several steps of the jailbreak: Sending initial data, waiting for reboot, waiting for device to finish booting, Preparing jailbreak data, and Sending payload data.


Step 6
You will be informed that the jailbreak is Almost done.

Step 7
On your device, locate the Absinthe icon and press it to complete your jailbreak. It could be on any homescreen.

If the server is down and you get an Error establishing a database connection message then tap the Settings icon on your springboard and turn on VPN.

You will get a configuration error; however, after about a minute your device will reboot with Cydia on the Springboard!
Subscribe to:
Comments (Atom)