Showing posts with label galaxy. Show all posts

Tuesday, February 11, 2014

Z3X BOX Samsung Update V15 4 GALAXY Update first Trios supported

Samsung Tool 15.4. Mega GALAXY Update, + TRIOS first in the world

ZRoot update, added SGH-T999, SGH-T999V autoroot all known version at this moment.

New models Added:

- full support GT-i9200 Galaxy Mega 6.3 (SAFE Direct Unlock & SAFE OneClick Imei repair*, flashing) - first in the world
- full support GT-i9205 Galaxy Mega 6.3 LTE (SAFE Direct Unlock & SAFE OneClick Imei repair*, flashing, Repair network) - first in the world
- full support GT-i9150 Galaxy Mega 5.8 (SAFE Direct Unlock & SAFE OneClick Imei repair*,flashing, Repair network) - first in the world
- full support GT-i9152 Galaxy Mega 5.8 (SAFE Direct Unlock & SAFE OneClick m/s Imei repair*,flashing, Repair network) - first in the world
- full support GT-i9190 Galaxy S4 Mini (Read codes, SAFE Direct Unlock & SAFE OneClick Imei repair*, flashing, Repair 3/4G network) - first in the world
- full support GT-i9195 Galaxy S4 Mini LTE (Read codes, SAFE Direct Unlock & SAFE OneClick Imei repair*, flashing, Repair 3/4G network) - first in the world
- full support GT-E1263 SPD (Read Codes, Direct Unlock, Repair imei:1,2,3, flashing ) - First in the world TRIOS supported

SAFE Direct Unlock & SAFE OneClick Imei repair* - new unique method without loosing EFS settings and userdata
- enjoy with easy safe method, phone will not lose network or 3/4G. After unlock, repair - restart phone please before using.

Discuss here.

Samsung S7572 Galaxy Trend II Duos Firmwares

Saturday, February 1, 2014

Guide How to Root and Install Recovery Samsung Galaxy Note 3 SM N900

Hi
Step by Step instructions on:
How to Root and Install Recovery Samsung Galaxy Note 3 SM-N900
Prerequisite:

1. Make sure your mobile should have 70 to 80% battery.
2. Enable USB debugging mode (Menu (app drawer) > Settings > Manage Applications > Development > USB Debugging – check box).
3. Ensure that you have backed up your all important data.

Requirements:

1. Download and install Samsung Galaxy USB Drivers (Download USB drivers or download Samsung Kies (drivers included))
2. Download “Odin“.
3. Download “CWM Recovery“.
4. Download “SuperSu“.

install CWM Touch Recovery :

1. Download all files on your computer .

2. Extract “Odin.zip” on the desktop and place “N900-Cwm-Recovery-6.0.3.8(0929).Tar for Samsung Galaxy Note 3” in it.
3. Now boot your phone into Download Mode

4. Open “Odin.exe” (from extracted folder) and connect your phone via USB cable to your computer in download mode. If your phone is connected successfully the one of the ID:COM boxes will turn yellow/green.

5. Click on “PDA” button and select file “.tar.md5” (from extracted folder).
6. Now, click on the Start button on Odin to start the installation process.
7. when the installation process is completed successfully you will see the “PASS” message on Odin and then your device will reboot automatically. Now, you can disconnect your phone from computer.

((Finish You have successfully installed CWM Recovery))


-------------------------------------------------------------------------
Root :

1. Download all files on your computer .

2. Extract “Odin.zip” on the desktop and place “ CF-Auto-Root-Ha3g-Ha3gxx-Smn900.Zip for Samsung Galaxy Note 3” in it.

3. Now boot your phone into Download Mode

4. Open “Odin.exe” (from extracted folder) and connect your phone via USB cable to your computer in download mode. If your phone is connected successfully the one of the ID:COM boxes will turn yellow/green.

5. Click on “PDA” button and select file “.tar.md5” (from extracted folder).
6. Now, click on the Start button on Odin to start the installation process.
7. when the installation process is completed successfully you will see the “PASS” message on Odin and then your device will reboot automatically. Now, you can disconnect your phone from computer.

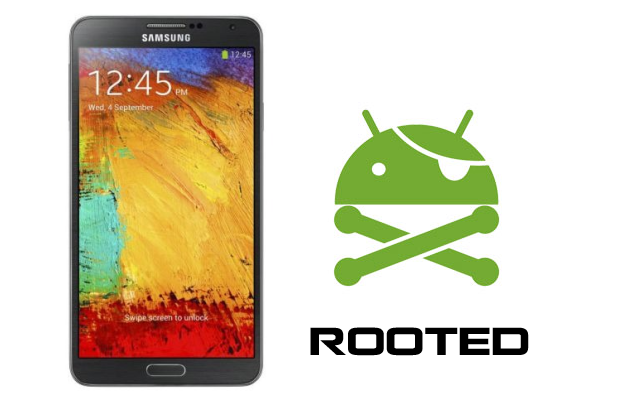
FINISH now your phone is ROOTED

Thursday, January 30, 2014

How to hard reset Samsung Galaxy Y Duos

Samsung Galaxy Y Duos Secret Codes
Galaxy Y Dual Sim Code
Here i am going to show you how to access the internal function of galaxy y or android phone for testing the various hardware parts of your phone if it is working properly or not with the help of this secret code you can test lcd, vibration, camera, sensor (accelerometer sensor, proximity sensor, magnetic sensor), touch screen, speaker, sub key, etc... if you have any hardware problem with your galaxy y duos you can identify with this code if it is working or not to do this follow the steps below.
First of all open your keypad


Then dial the secret code *#0*#. Now you get a screen with title LCD TEST and below that you have lots of option to test various hardware parts of your phone such as speaker, sensor, lcd, etc
To go back use right physical button
while testing the touch you have to touch and mark all the squares back button does not work
Other use full secret codes for android phone tested on galaxy y


  • * #1234# to check software version of phone.
  • *#12580*369# to check software and hardware information.
  • *#0228# Battery status (ADC, RSSI reading)
  • *#32489# Service mode
  • *#7780# factory data reset galaxy y
  • *2767*3855# Full factory reset (Dont dial it does not ask you to confirm unless you have problem)


These codes will work on all the models of galaxy series.


Tuesday, January 28, 2014

Samsung Galaxy Gear gets first custom ROM includes native app installation and full


FEATURES
  • MK7 BASE
  • ROOTED
  • SUPERUSER
  • COMPLETELY DEODEXED
  • NOVALAUNCHER INCLUDED
  • HOMEBUTTON FIX / POWER BUTTON LOCKS SCREEN WHEN USING CUSTOM LAUNCHERS.
  • NO WIPE BASE
  • WEATHER WIDGET / REMOVED STATIC "WEATHER" TEXT
  • DISABLED SAMSUNG SIGNATURE VERIFICATION
  • NATIVE APK INSTALLATION
  • INCREASED VIDEO RECORDING LIMIT TO 60 SECONDS
  • VPN ENABLED
  • CM10.2 BROWSER
  • WALLPAPER SUPPORT
  • LIVE WALLPAPER SUPPORT
  • CM10.2 GALLERY
  • THIRD PARTY CONTACT WIDGET & APP CRASH FIX
  • SETTINGS / FULL SETTINGS DIALOG
  • MTP SUPPORT / ENABLED IN STORAGE SETTINGS
  • BLUETOOTH TETHERING
  • MULTIPLE BLUETOOTH DEVICE PAIRING
  • NATIVE EMAIL CLIENT
  • NAVIGATION BAR
FAQ / IT DOESNT WORK ! WAH
  • INTERNET ACCESS
    GO INTO "FULL SETTINGS -> BLUETOOTH -> SELECT YOUR PHONE SETTING ICON (ON THE RIGHT OF PHONE NAME) -> TICK INTERNET ACCESS".
    ENSURE BLUETOOTH TETHERING IS ENABLED ON YOUR PHONE BEFORE HAND OBVIOUSLY.

    *NOTE* ENSURE YOUR MOBILE DEVICE SUPPORTS TETHERING, US VARIANT PHONES HAVE RESTRICTIONS INPLACE.

    *NOTE 2* BLUETOOTH TETHERING DOES NOT AUTO RECONNECT, INSTALL THIS THIRDPARTY SOLUTION ON YOUR GEAR TO ENABLE AUTO RECONNECT.
  • HOW DO I FULL WIPE?
    BOOT INTO RECOVERY MODE AND SELECT THE "RECOVERY" OPTION. DO THIS AFTER FLASHING THE ROM
  • SCREEN FLICKERING/GITTERING
    THIS IS CAUSED BY THE INITIAL BOOTUP, REBUILDING THE CACHE AND INITIALIZING ALL THE APPS. GIVE YOUR GEAR A FEW MINUTES TO SETUP AND RESTART.
  • SCREEN UNLOCKS TO NOVALAUNCHER PAGE PREVIEW?
    GO INTO "NOVA SETTINGS -> GESTURES -> HOME BUTTON -> NONE".
  • USB DEBUG
    GO INTO "SETTINGS -> GEAR INFO -> ABOUT GEAR", TAP SOFTWARE VERSION 10 TIMES.
  • ENABLE UNKNOWN SOURCE APK INSTALLATION
    GO INTO "FULL SETTINGS -> SECURITY -> TICK UNKNOWN SOURCES".
  • ENABLE MTP
    GO INTO "FULL SETTINGS -> STORAGE -> MENU BUTTON (TOP RIGHT OF SCREEN) -> USB COMPUTER CONNECTION -> MEDIA DEVICE (MTP)".
  • WATCH STYLER NOT WORKING
    ENSURE ITS SELECTED AS THE DEFAULT WATCHFACE IN GEAR MANAGER.
    IF CLOCK FACE DOES NOT UPDATE UPON CHANGING, RESTART GEAR.
  • DOUBLE CLICK HOME BUTTON DOESNT WORK ON TOUCHWIZ LAUNCHER !

    *NOTE* DO NOT DO THE FOLLOWING IF YOU ARE USING NOVALAUNCHER, YOU WILL NOT BE ABLE TO MANUALLY LOCK YOUR GEAR.

    NAVIGATE/PULL THE FOLLOWING FILE FROM YOUR GEAR: /SYSTEM/USR/KEYLAYOUT/GPIO-KEYS.XML
    EDIT IN A TEXT EDITOR SO IT LOOKS LIKE THE BELOW:
    Code:
    key 115   VOLUME_UP         WAKE
    key 114 VOLUME_DOWN WAKE
    key 116 POWER WAKE
    key 172 HOME WAKE
DOWNLOAD

MD5: 2ccc64976c0a043109159e9a11a6292f
INSTRUCTIONS


  • HOLD POWER BUTTON ON GEAR UNTIL THE RESTART SCREEN APPEARS.
  • ON THE RESTART SCREEN, PRESS POWER BUTTON 5 TIMES TO ENTER RECOVERY MODE.
  • PRESS POWER BUTTON ONCE TO NAVIGATE THE RECOVERY SCREEN TO DOWNLOAD MODE.
  • HOLD POWER BUTTON FOR 3 SECONDS TO SELECT THE OPTION AND ENTER DOWNLOAD MODE.
  • SELECT "AP" OPTION & SELECT THE ROM, LEAVE OTHER OPTIONS AS DEFAULT.
  • VERIFY YOU CAN SEE YOUR GEAR IN THE ID:COM SECTION OF ODIN & PRESS START TO BEGIN FLASH.

Sunday, January 26, 2014

Samsung Galaxy S III Android 4 2 1 Jelly Bean LEAKED BETA firmware

Android 4.2.1
is still under testing phase by Samsung and they will release the official final Android 4.2.1 Jelly Bean update for the Galaxy S III after the launch of the Samsung Galaxy S IV.


New enhancements in I9300XXUFMB3 FW:

- Android 4.2.1 – JOP40D
- Improved Ripple effect on Lockscreen
- New Android 4.2.1 Lockscreen with widgets
- Daydream (Settings>Display)
- New Additions in Notification Center
- Notifications are more actionable
- Voice Command (Let’s you control various parts of the phone using voice commands)
- Found more? Tell us about them in the comments below!

WARNINGS:

We have repackaged this firmware into an ODIN Flashable firmware ourselves from the dump files we took from Saturn’s device. This firmware will increase your binary counter, if you don’t know what this means then don’t flash this firmware. This Firmware will also change your device status to Modified. This firmware doesn’t contain any Modem so the Modem you are using before flashing this firmware will remain. This is a PRE-RELEASE version so not official from KIES. As this is a PRE-RELEASE firmware some minor bugs are to expect.
We have FULLY TESTED this firmware and this firmware works perfectly as any other official firmware.

Firmware Details

Android Version: 4.2.1 – JOP40D (Jelly Bean)
PDA: I9300XXUFMB3
CSC: I9300OJKFMB3
MODEM: N/A
Region: Middle East
Carrier: Unbranded
Changelist: 171637
Build Date: 19th February 2013
Download: I9300XXUFMB3_I9300OJKFMB3_ILO.zip


Screenshots:


Big Thanks To ,

Thanks to forum member Saturn from XDA and clubandroid

Saturday, January 25, 2014

How to increase internal memory of samsung galaxy ace

Samsung Galaxy Ace is featured with 832 MHz Processor, a RAM of 512 MB, and a 32 GB upgradable storage. Like the previous Samsung’s Smartphones, it has also created a large user base or fan base. With an affordable price range, they also have provided some really good features with an elegant design and stunning look
Android Smartphone are an excellent way to take all your private and important files, images, data, and all other imperative data with you. Thus we can declare that it is one of the finest gadgets in our pocket which has plenty of information regarding you.
So in this tutorial we will be showing you how to increase the internal memory of your Samsung Galaxy Ace. Just follow the simple steps given below

Disclaimer

This tutorial will definitely work when using Samsung Galaxy Ace only. While working of it on others is not yet confirmed. On applying this installation to another model or device may give an unwanted result. While applying this update we will not be responsible if anything occurs to your device, so continue at your own risk.

Pre-Requisite

  • For successful completion of this rooting process charge your phone up to a minimum of 75% battery.
  • You must take a back-up of all your personnel items and other impotent data, such as Call Logs, SMS, Contacts, Audios, Images, Videos, APN (Access Point Names) settings, Bookmarks, MMS settings, on your phone.
  • One must install a custom recovery image particularly for his Android device. To do this, ClockworkMod Recovery should be downloaded using the Internet.
  • If you have not, then you must unlock your Android device’s Bootloader.
  • You must enable USB Debugging mode on your Samsung Galaxy Ace. Just follow, Settings–>Applications–>Development–>USB debugging. There select the USB Debugging icon.

Steps for Increasing Internal Memory of Samsung Galaxy Ace

Increase internal memory of samsung galaxy ace 
Step 1
Firstly, download MiniTool Partition Wizard app to your computer and then install it. You may download it by just clicking it here.
Step 2
From your Android device disconnect & remove the memory card and insert it in your Computer using a card reader. You must not use USB cable, since this app may not work properly through USBs.
Step 3
Now run the above downloaded app on your computer.
Step 4
Now click on SD card and there do the right click on the “Option” icon. Then select the “Delete” option for a complete deletion of data on your SD card.
Step 5
Now again do the right click on the “Option” icon. Then select the “Create New” option.
Step 6
Now, choose the file type as FAT32 and there allocate the space with such an amount that you believe you’ll be utilizing.
Step 7
Next, again apply the same procedure as above and choose “Create as: Primary”, so to create a new partition (external). This space will be utilized for storing downloaded apps.
Step 8
Finally, select the “Apply” option to finish the process. After this you may insert your SD card into your Samsung Galaxy Ace.
Finished!